This recipe is part of our collection of Chinese holiday and festival foods. Sign up for our newsletter to receive family-friendly activity, recipe and craft ideas throughout the year!
In case you’re not familiar, rice dumplings are the traditional food most associated with the Dragon Boat Festival. Known as zongzi in Mandarin and joong in Cantonese, rice dumplings are parcels of glutinous rice stuffed with different savory or sweet fillings and wrapped in bamboo leaves. They’re eaten during the Dragon Boat Festival to symbolize the glutinous rice balls the villagers tossed into the Miluo River while searching for the poet Qu Yuan.
This year, my family made rice dumplings together for the first time. Preparation takes the better part of a day, making it both a really fun family activity and something that’s probably best reserved for a special holiday occasion. Aside from learning to wrap and tie the dumplings, which does take some practice, I learned that making rice dumplings isn’t especially difficult, so have no fear if your family are beginners like we were.
The process to make rice dumplings actually began the day before we hit the kitchen. I visited Chinatown to pick up a few ingredients we didn’t have in our pantry: glutinous rice, dried mung beans, dried bamboo leaves, dried peanuts, dried Chinese sausage, a piece of pork belly and kitchen twine. M&A Cash & Carry, a dried goods store in Oakland Chinatown, helpfully had all of these items for local would-be rice dumpling makers carefully arranged together in bulk bins, so I could buy only what I needed.
Here’s how to make rice dumplings, step-by-step. The detailed tutorial with pictures and directions is at the bottom of the page.
Your turn! What tips can you share from your family’s recipe? Want to ask a question before you start cooking? I’d love to hear from you in the comments section below!
Rice Dumplings Recipe
Makes: 25 Dumplings | Prep Time: 1 Day | Cook Time: 6 Hours

Ingredients
50 dried bamboo leaves (20″ size)
1 1/2 cups uncooked glutinous rice
1 1/2 cups dried mung beans
1 tablespoon salt
1 pound pork belly
3/4 teaspoon Chinese five spice powder
1/2 teaspoon ground white pepper
3/4 teaspoon salt
2 cups dried peanuts
5 dried Chinese sausages
25 lengths of kitchen twine (60″ apiece)
Directions
1. Cover the dried bamboo leaves with water in a large baking dish and soak overnight.
2. Cover the glutinous rice and mung beans in separate pots or bowls with warm water and soak for 5 hours.
3. Steam the pork belly in a bamboo steamer for 20 minutes. Slice the pork into 25 pieces and then season with the five spice powder, white pepper and 3/4 teaspoon of salt.
4. Slice each dried Chinese sausage into 5 pieces.
5. Drain the glutinous rice and mung beans, combine in a dry bowl with the 1 tablespoon of salt and stir well.
6. Create your rice dumpling filling station by placing the glutinous rice and mung bean mixture, the sliced pork belly, the sliced Chinese sausages and the dried peanuts in bowls on a cutting board. Drain the bamboo leaves and place nearby.
7. For each dumpling, place 1 tablespoon of the glutinous rice and mung bean mixture into a cone formed by two overlapping bamboo leaves, followed by the sliced pork belly, the sliced Chinese sausage and a few dried peanuts, and then cover with 2 more tablespoons of the glutinous rice and mung bean mixture. Fold down the ends to form a tight pyramid and then bind with kitchen twine. Use up all the filling ingredients to create 25 dumplings.
8. Place the dumplings in a large pot of boiling water and boil for 6 hours, adding more water as needed to keep the dumplings covered. At the end of 6 hours, remove the dumplings from the water and allow them to dry.
9. Unwrap the dumplings carefully and serve hot, freezing any leftovers to reheat in the future.
Step-By-Step Tutorial
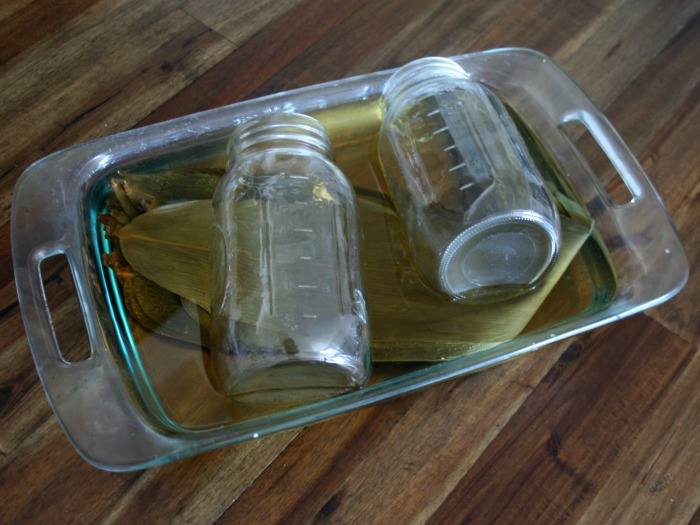
The first step is to soak your bamboo leaves overnight, so they’re flexible enough to make wrappings without breaking. I used a large baking dish with a couple of canning jars as weights. That’s it. Go to sleep for the night.
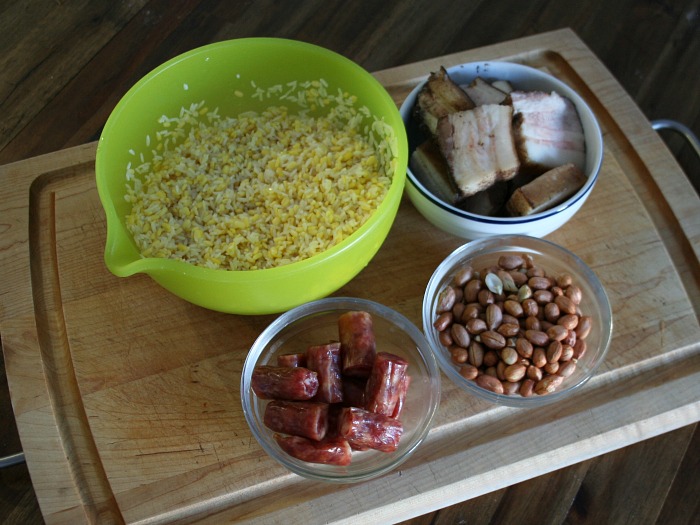
In the morning, prepare the rest of your filling ingredients. First, soak your glutinous rice and mung beans for 5 hours. I just put them in pots on the stove and stirred occasionally. Next, steam and then season your pork belly. Arrange your rice, mung beans, pork belly, Chinese sausage and dried peanuts in bowls to create a wrapping station.
If you started your rice and mung beans soaking early in the morning, then you should be ready to start making rice dumplings by early afternoon. This is the time to grab your spouse, parents, kids and anyone else who might be in the house.
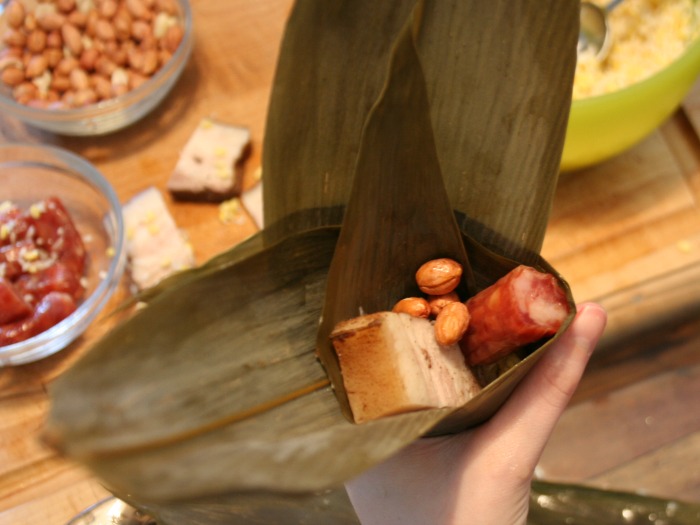
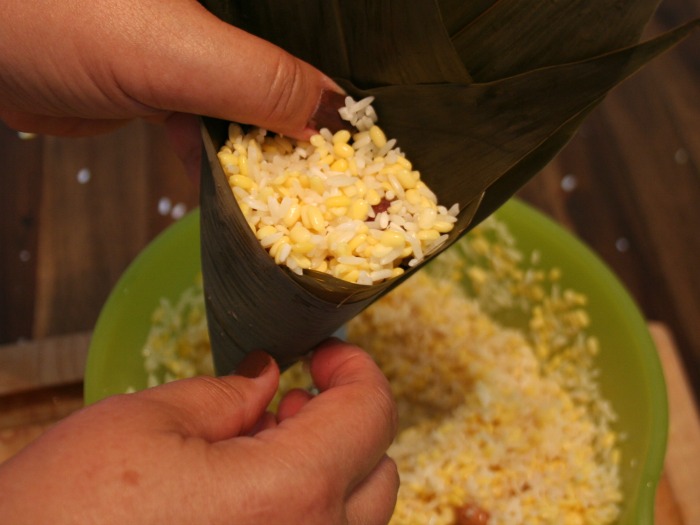
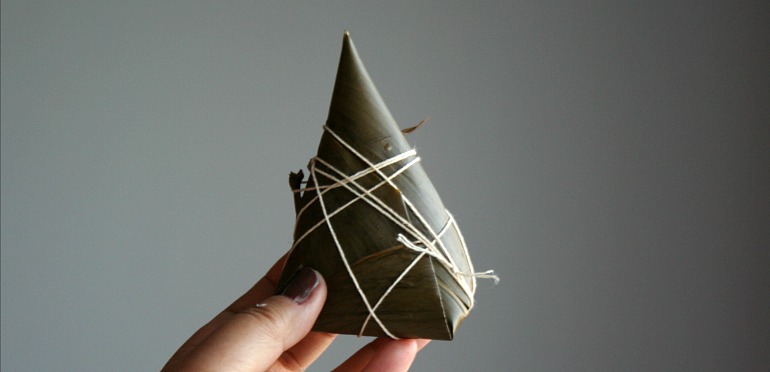
The trick to making a rice dumpling is wrapping and tying it into a pyramid with all the corners closed, so that the filling doesn’t spill out during cooking. Rice and mung beans are really small, so this means you really have to wrap the corners tightly!
It helps to work in teams. We had one person hold two bamboo leaves vertically with a slight overlap, then twist them in the middle to form a cone. It looked like a Japanese sushi hand roll, if you’re familiar with those.
From there, you add the fillings, scoops of rice and mung beans, followed by pork belly, sausage and peanuts, and then topped again with rice and mung beans.
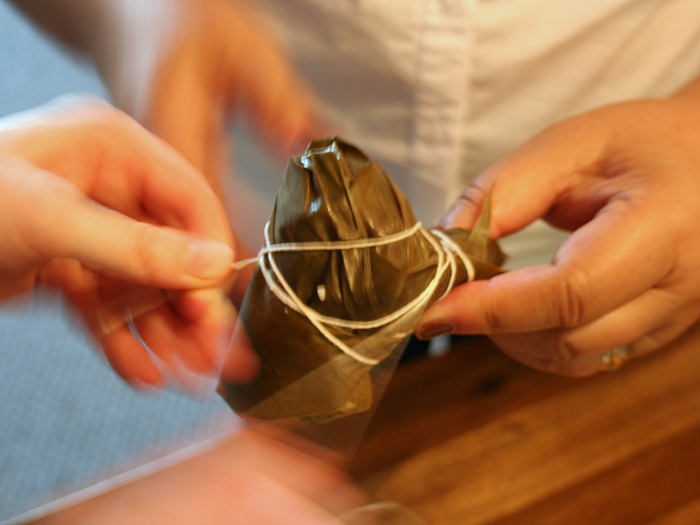
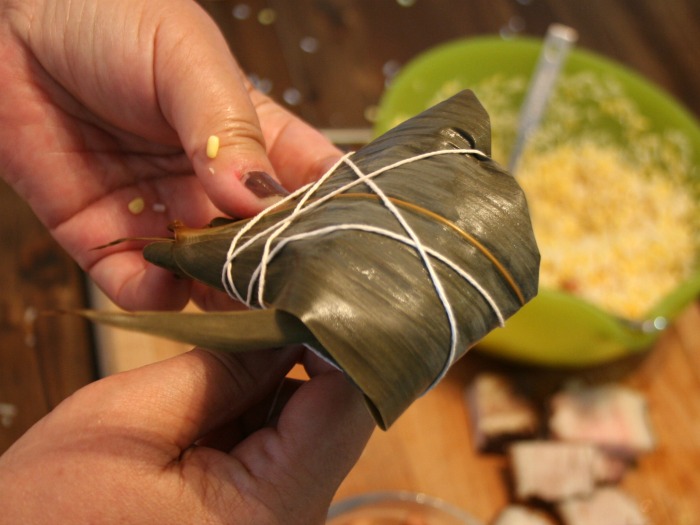
Now here’s the tough part. The person holding the rice dumpling needs to fold down both loose ends of the bamboo leaf cone over the top and sides of the package to form a tight pyramid shape. Make sure your corners are sealed! It took us a few tries to get it right.
At this point, the second person on the team should swoop in with kitchen twine to bind the dumpling together on all sides. The rice dumplings you buy in Chinatown will look prettier, but really all that matters is that you’ve successfully closed the dumpling.
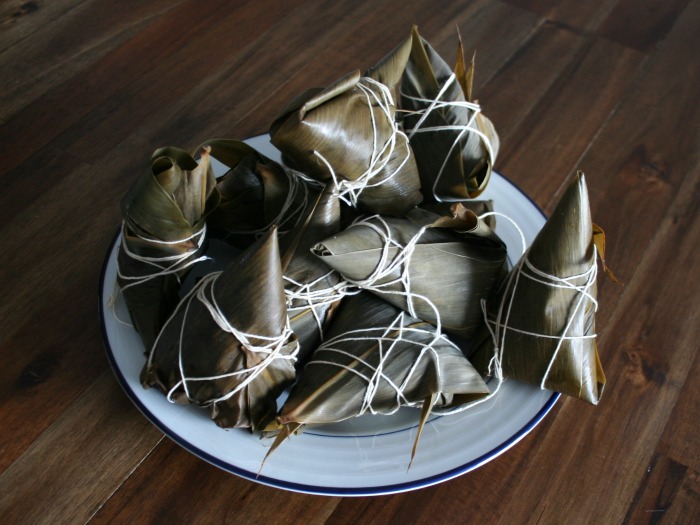
Fill, wrap and repeat until all of your supplies are exhausted. For us, it was a couple of hours filled with lots of conversation and laughter, as we all stood around the table making our best efforts. It was great — after all, the family time really is the point of the entire exercise. At the end, we also had a beautiful pile of rice dumplings!

Once you’ve made all your dumplings, the last step is to boil them for six hours. I used our crock pot for this last task and left it sitting on high through the early evening, so that we weren’t tied to the kitchen. Once the time is up, you can either eat the dumplings immediately or freeze them for the future. In the latter case, just boil a frozen rice dumpling for 30 minutes to reheat.
Making rice dumplings for the Dragon Boat Festival was awesome! It’s a full day family activity that requires precise attention to a set of preparation steps and a quick trip to Chinatown, but little else in terms of special supplies or expertise. The results of our cooking project were delicious and with 25 rice dumplings in the freezer, there’s plenty for future meals or for gifts around the neighborhood.
HT: Recipe adapted from Chinese Feasts & Festivals: A Cookbook.


Nicole Renee
I think they look pretty fantastic! Great job! And awesome explanations too!
Wes Radez
Thanks, Nicole. The experience made for a fun day — such a great way to get a lot of hands working together around the table!
Yin Do
So instead of boiling you cooked them in a crock pot? With water? How different do they turn out compared to boiling them? I wanted to try this method.
Wes Radez
Whether you use a pot on a stove or a crock pot, you’ll still want to boil the dumplings in water for 6 hours to cook them through. Either vessel should work fine!
Jim Woo
The ingredients and shapes of zongzi are highly regional and very differnt. It would be interesting to ask people from different regions to contribute their recipe and publish them here.
Wes Radez
Love that idea, Jim! I’m most familiar with HK-style varieties and have tried Shanghai and Taiwan-style, as well. But I’ve heard so many stories from friends about the homestyle zongzi that their moms, grandmas and aunties made…I’m sure there are some great recipes tucked away in family recipe boxes all over the country! ~Wes
Sandra
My family also adds dried chestnuts, Chinese mushrooms, chicken and dried salted shrimp ( the “dried” ingredients are soaked over night in water) in the joong.
I love reading your recipes and newsletters! Great job.
Wes Radez
Thanks for adding your variation, Sandra. I love hearing about the different wrinkles every family adds to these recipes. I’m thinking about building that shared history a bigger part of the site. ~Wes
Winnie
Thank you for these recipes and tutorials! You’ve demystified my favorite childhood foods that I can no longer get! I will try to re-create these traditional foods!
Wes Radez
You’re welcome, Winnie! I’m glad that I helped you connect with a childhood memory! ~Wes
Evelyn Seto
Great instructions Wes. I love joong! My family used to add the chestnuts and salted duck egg also. It’s a very complete meal for sure!
Wes Radez
I’m so pleased, Evelyn. I love eating them this time of year, when it’s chilly and wet outside. Wonderful breakfast or lunch. ~Wes
ron chow
We put much more in ours. Cook in pressure cooker for 40-45 mins. We use three pressure cookers. Make 100+.
Wes Radez
Wow, that sounds incredible! Does the pressure cooker replace the longer (several hours) cooking times in my version? How long do you have to cook afterwards to reheat? ~Wes
Anne
My mother was well-known in Chicago for her “doong” (joong in our Kaiping dialect). She would individualize what each of us like by telling us how many strands of string our doong has wrapped around it or who has a toothpick on theirs.
Wes Radez
Thank you for sharing that wonderful memory, Anne. Sounds like she paid a lot of loving attention to that work! ~Wes
cheah sek mei
I am from malaysia….I learned from my mother we need to fry garlic after it turn to brown then we put in the rice, fry it a few minutes then we add black soya sauce, salt, five spice powder and sugar to taste…then take it out and let it cool off before we wrap it into the cone with other ingredients.
Wes Radez
Love it! Thanks for sharing that variation! ~Wes
Yen
Dear Wes
My parents used to make 300+ joongs each year to distribute to his EIGHT siblings (thank god I have only three! ). They bought a huge pot just to cook the joongs once a year. My mum would wake up at 3am to wrap the joong and my dad will be in charge of cooking it. Preparations started a week before the actual event… That was more than twelve years ago. Dad passed and mum is immobile. That huge pot reminds me of my mum’s nyonya Joong (sweet version) each time I see it.
I wanted to make it but my grand-auntie who lives nearby always give me a few which is enough to satisfy my cravings. There is one shop in Singapore selling Joongs exactly like those my mum used to make. Unfortunately, now that I am relocated back to Malaysia and travelling involves too much effort and dangerous; I have to make my own, ha!
I learned to wrap joong using sands when I was about twelve years old. I started with wrapping mini plain joongs for prayers.
Now that Malaysia is still under lockdown, I am tired of making breads and my brother kept hinting that I haven’t fulfilled my promise to make joongs for the past couple of years, I’m going to use your crock pot method to cook joong overnight. I will also cook another batch using pressure cooker just so I can compare the taste. I suspect the crock pot method joong will be tastier.
I’ve never tasted joongs with mungbean, it look so interesting. Will do that next.
Cheers.
Wes Radez
Thank you so much for sharing your memories, Yen. Good luck making your Joong this year! ~Wes